 Pin It
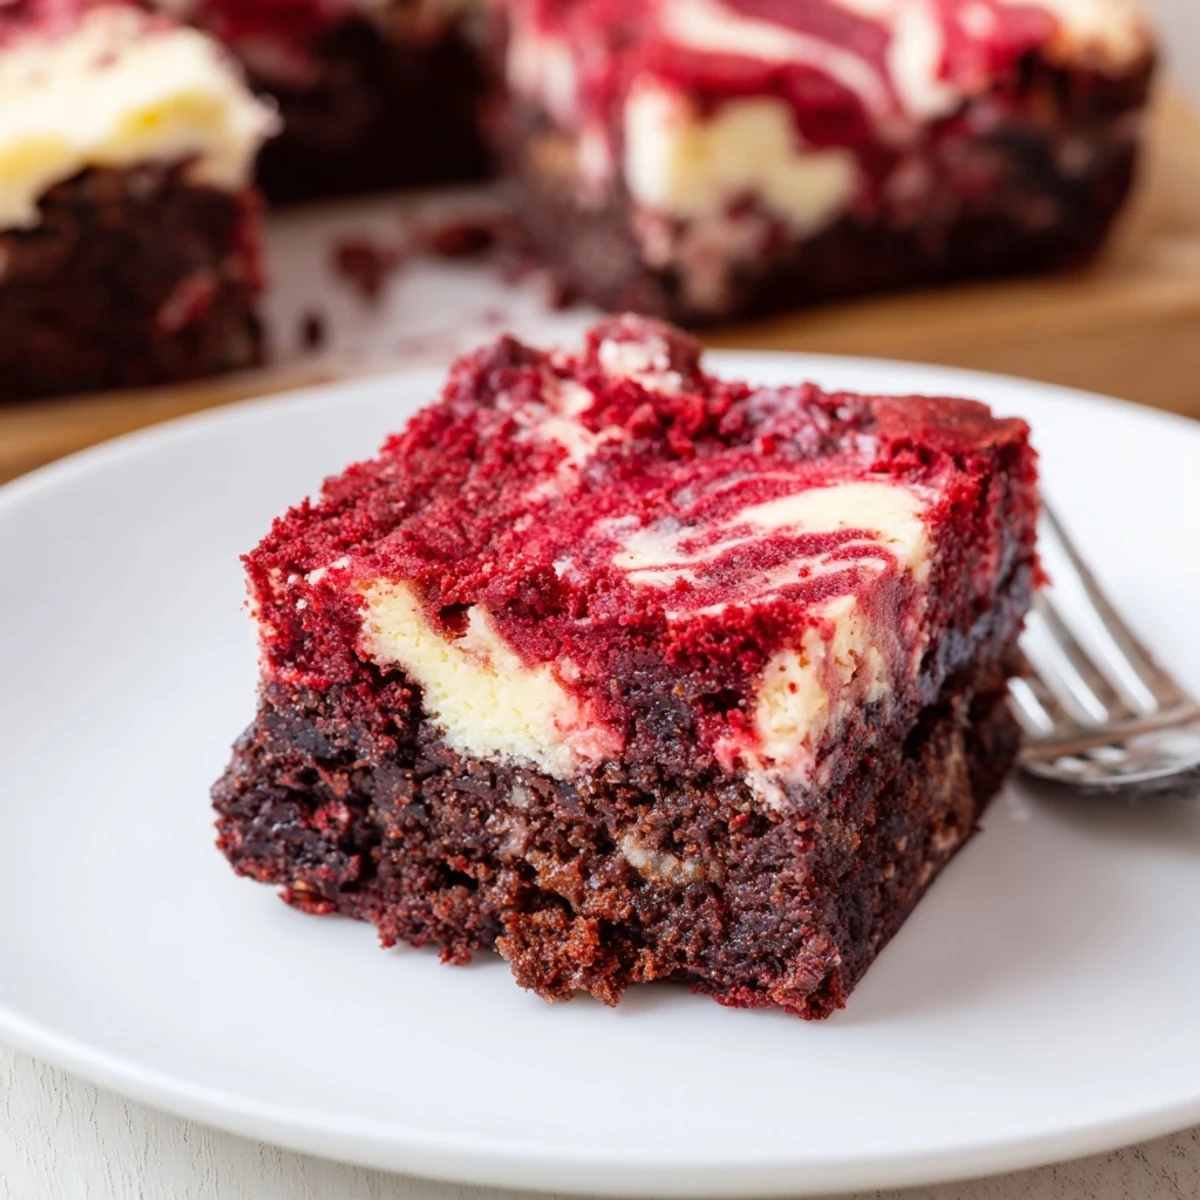
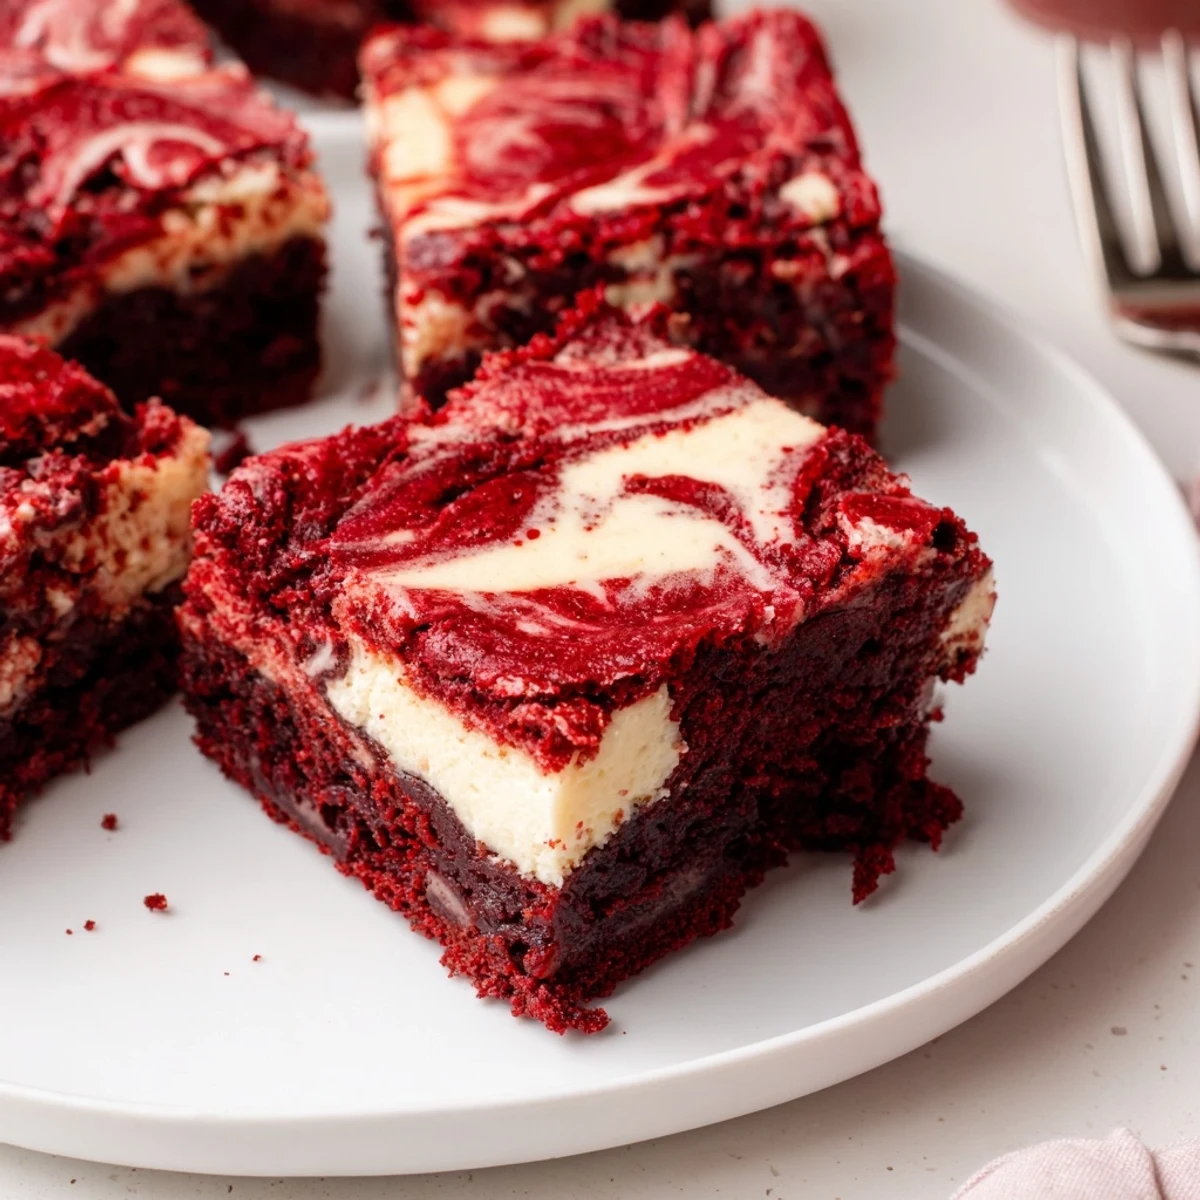
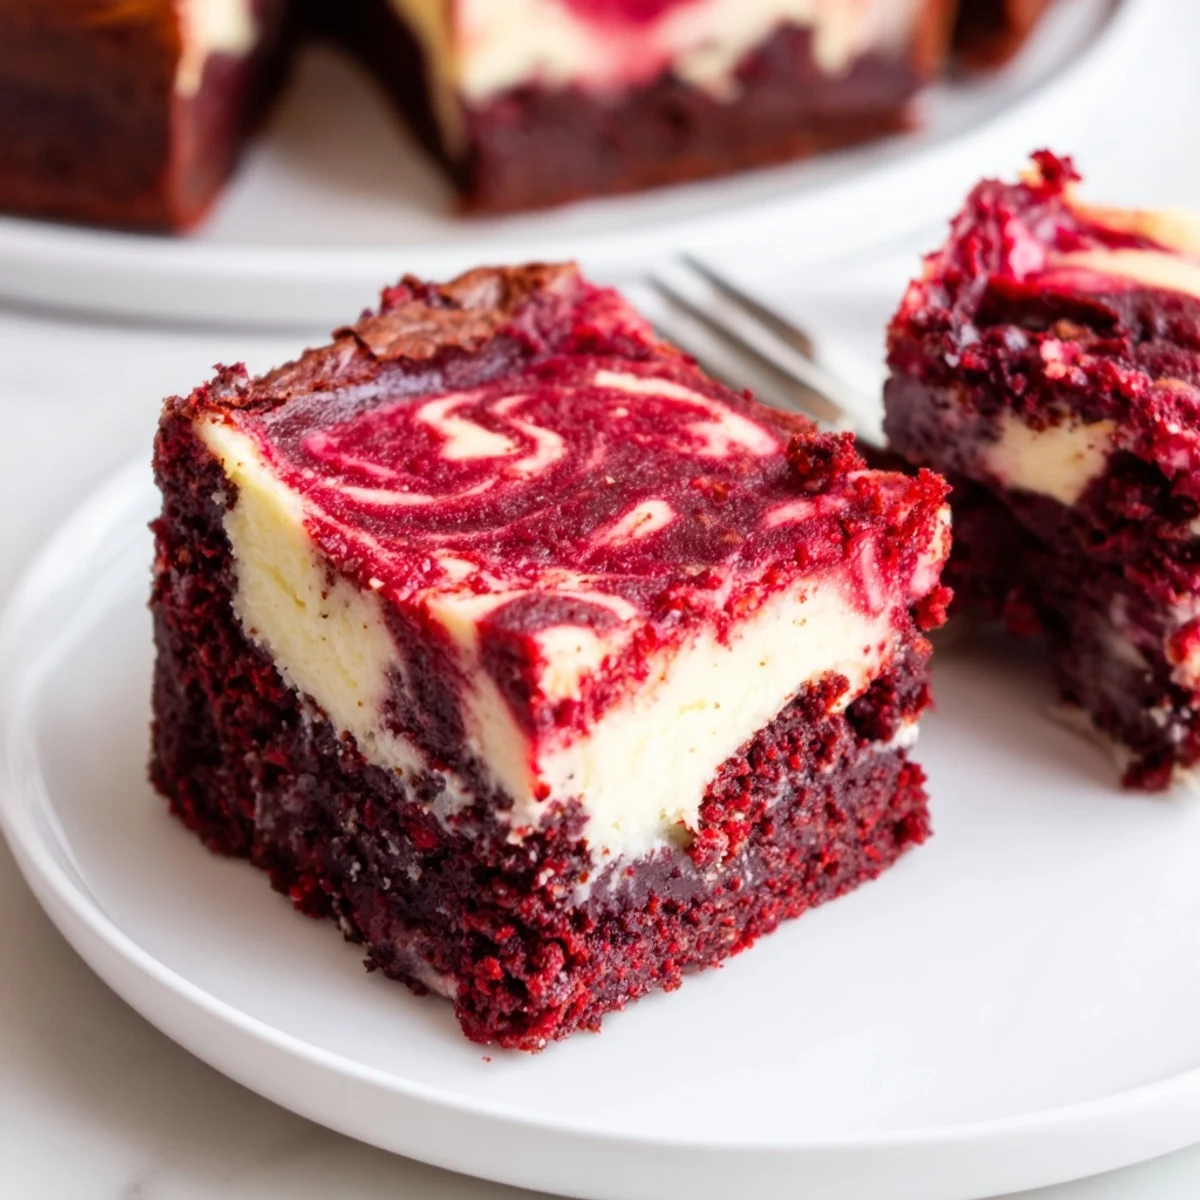
 These fudgy red velvet brownies are layered with a silky, tangy cheesecake for an indulgent bar that yields 16 squares. Melted butter, sugar, eggs and red color form the brownie base; cream cheese, sugar and an egg become the cheesecake top. Dollop reserved batter and swirl for a marbled finish. Bake 33–37 minutes, cool fully and chill at least 1 hour before slicing for clean squares and best texture.
The first time these red velvet brownies emerged from my oven, the scent drifting through the house surprised even my usually hard-to-please neighbor. The colors are enough to turn any afternoon into a celebration—cheerful reds marbled with creamy swirls. I had music playing, a little too loudly, and found myself dancing while scraping the bowl, not realizing how a simple treat could feel like such an event. There’s something secretly thrilling about slicing into that first square to see how the marbling turned out.
I brought these to a friend's game night thinking they might get ignored among the chips and other snacks, but they disappeared so quickly I barely got a bite myself. The group debated whether the cheesecake or brownie layer was their favorite, and even the quietest among us had plenty to say. Spontaneous laughter and sticky fingers made it more of a memory than any victory at the table. I still associate these brownies with the sound of shared jokes and the kitchen light reflecting off the marbled top.
Ingredients
- Unsalted butter: Melted butter gives the brownies their fudgy texture; use fresh, high-quality butter for a richer taste.
- Granulated sugar: Adds sweetness and that signature shiny, crackly crust—give it a quick whisk with the butter for the best results.
- Large eggs: Bring them to room temperature so the batter doesn't seize up, which I learned after an overly dense batch.
- Vanilla extract: A splash rounds out both layers; pure vanilla offers the deepest flavor.
- Red food coloring: The key to the vibrant color; adjust for intensity, but be careful not to overdo it or you'll taste the dye.
- All-purpose flour: Sift to avoid lumps and keep the brownie layer tender.
- Unsweetened cocoa powder: Balances the sweetness and amplifies that rich chocolate taste—always use unsweetened, not hot cocoa mix.
- Salt: Just a pinch sharpens all the flavors and shouldn't be skipped.
- Cream cheese: Softened for smoothness—let it sit out a while before you begin so there are no pesky lumps in the cheesecake layer.
Instructions
- Line the pan:
- Layer parchment paper into your baking pan, letting it hang over the edges so you can lift the brownies easily later—save yourself the headache of stuck corners.
- Mix the brownie base:
- Whisk melted butter with sugar until it glistens and thickens, then add eggs, vanilla, and that bold red food coloring, mixing just until smooth and lively.
- Combine dry ingredients:
- Sift in flour, cocoa, and salt, gently folding with a spatula; don't overmix or your brownies will lose their fudgy magic.
- Spread and reserve:
- Pour most of the red velvet batter into your prepared pan, smoothing it out, but resist the urge to use it all—keep about a quarter back for swirling.
- Cheesecake swirl:
- Beat cream cheese and sugar until pillowy, whisk in egg and vanilla, and pour this lush layer over the awaiting brownie base.
- Create the marble effect:
- Spoon dollops of red velvet batter across the cheesecake, then gently swirl with a knife or skewer—this is where art meets dessert.
- Bake to perfection:
- Slide the pan into the oven for about 35 minutes, smelling for chocolate and looking for set edges—a few moist crumbs clinging to a toothpick is your cue to pull them out.
- Chill and serve:
- Cool completely, then chill for at least an hour; as the anticipation builds, so does the flavor, and the brownies slice beautifully when cold.
 Pin It
 There was a quiet afternoon when I made these just for myself, and it felt oddly empowering to cut a perfect square, set it on my favorite plate, and savor every bite in the silence. Sometimes it's the solitary indulgences that turn a stressful day into something worth remembering.
Tips for Marbling Like a Pro
I used to fret that I'd over-swirl and lose the layered look, but a gentle zigzag with a chopstick brings out the most beautiful patterns. If you're feeling artistic, experiment with figure-eights or simple crisscrosses—no two batches ever look quite the same.
Getting Perfect Texture Every Time
The difference between gooey and cakey comes down to baking time and patience. My best advice: watch the edges, not just the center, and let the brownies rest in the fridge so they set into clean squares that hold their decadent layers.
Serving and Extra Touches
Dusting these with powdered sugar or adding a scattering of fresh berries takes them from snack to showstopper. For gatherings, I sometimes lay them out in tidy rows on a platter and they never last long enough for leftovers.
- Add a few chocolate chips over the brownie layer before baking for extra indulgence.
- Let the brownies come to just below room temperature before serving if you like a slightly softer bite.
- Wipe your knife between cuts for picture-perfect slices every time.
 Pin It
 However you serve these brownies—with friends, at a party, or just on a quiet night—they promise a little moment of delight in every bite. Enjoy the process, and don’t be surprised if this recipe earns you lifelong fans.
Recipe FAQs
- → How do I tell when the center is done?
-
The edges should be set and the center will look mostly firm but slightly jiggly; a toothpick inserted should come out with a few moist crumbs rather than raw batter.
- → Can I use gel food coloring instead of liquid?
-
Yes—gel color gives a more vivid hue with less volume, so start with a small amount and add until you reach the desired red without altering batter consistency.
- → How do I achieve a good marbled swirl?
-
Drop spoonfuls of reserved red batter over the cheesecake layer, then drag a knife or skewer through the surface in gentle swirls. Avoid overmixing to keep distinct veins of color.
- → What’s the best way to store leftovers?
-
Cover chilled squares and refrigerate for up to 4 days. For longer storage, freeze tightly wrapped pieces for up to 2 months; thaw in the fridge before serving.
- → Any substitutions for cream cheese?
-
Mascarpone or a full-fat Greek yogurt blend can work in a pinch, but expect a slightly different tang and creaminess. Dairy-free cream cheese can be used for a vegan-friendly version, though texture may vary.
- → Can I add chocolate chips or other mix-ins?
-
Yes—sprinkle chocolate chips or chopped nuts over the brownie layer before adding the cheesecake to add texture and richness. Keep additions moderate so the layers bake evenly.