 Pin It
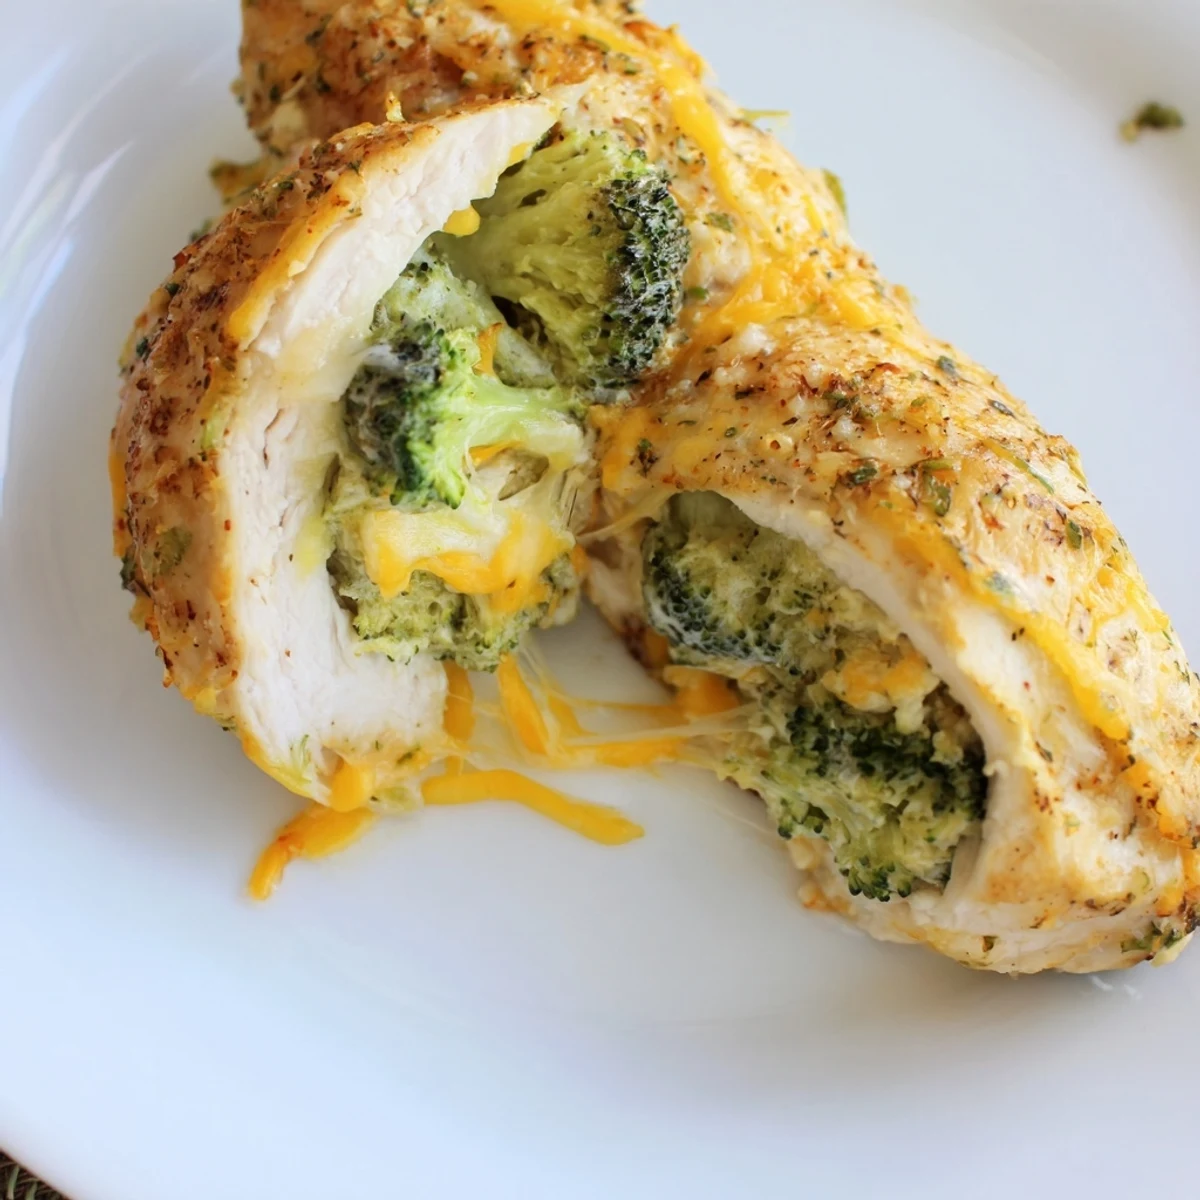
 Cut pockets into chicken breasts, season inside and out, then stuff with finely chopped broccoli, cheddar, cream cheese, Parmesan, Dijon and garlic. Brush with olive oil and bake at 400°F (200°C) for 25–30 minutes until the center reads 165°F (74°C). Rest 5 minutes before serving. Tip: pat chicken dry for better browning, secure pockets with toothpicks, and add cooked bacon or swap cheeses for variation. Serve with salad or roasted vegetables.
Steam curled beneath my nose as the cheese began to melt, a savory promise of dinner to come. I still find myself grinning at how a simple broccoli and cheese duo could elevate chicken in such a comforting way. That first time, I was mostly drawn in by the idea of stuffing—both for the flavor and the secretive fun of tucking something special inside. Even now, this dish sends a happy hush across the table as everyone takes their first cheesy forkful.
The night I made this for friends, I remember the kitchen erupting with laughter as toothpicks scattered and gooey cheese strings clung to my fingers. Even our serious eater admitted defeat, trading utensils for fingers when it came time to swipe up every last bit of filling. These are the moments the recipe lives for—messy, loud, and absolutely worth it.
Ingredients
- Boneless, skinless chicken breasts: You want plump, evenly-sized breasts for easy stuffing and uniform cooking—press each with your palm to spot any thick spots to trim.
- Olive oil: This helps the seasonings stick and brings golden color—work it over and inside the pocket for deep flavor.
- Garlic powder & paprika: The classic backbone for both comfort and kick—use smoked paprika if you like extra warmth.
- Salt & black pepper: I always start light, tasting the filling and seasoning again at the end if needed.
- Broccoli florets: Chopping broccoli tiny lets it tenderize faster—any big chunks stay too crunchy against the melty cheese.
- Cheddar cheese (shredded): Sharp cheddar stands up to the chicken’s flavor—use freshly grated for the best melt.
- Cream cheese (softened): This makes the filling extra lush and helps hold everything together—let it come to room temp for easiest mixing.
- Parmesan cheese (grated): Just a tablespoon or two adds salty depth I never skip—sprinkle a pinch on top for a crispier finish.
- Dijon mustard: Surprising, but it adds a tang that keeps things from feeling flat—go easy; a little goes far.
- Fresh garlic (minced): The tiniest bit of sharpness cuts through the richness—don’t substitute garlic powder here if you can avoid it.
Instructions
- Get the oven ready:
- Switch the oven to 400°F and line your baking sheet—if I'm out of parchment, a quick oil rub does the trick.
- Mix up the seasonings:
- I toss together the garlic powder, paprika, salt, and pepper, then give the bowl a swirl to chase away lumps.
- Prep the chicken:
- Use a sharp knife to carve a deep pocket (the trick is going slow), then pat each breast dry for better browning.
- Season with care:
- Rub olive oil and seasoning over each chicken breast, not forgetting the inside—every bite should taste seasoned, not just the surface.
- Make the stuffing:
- Mix chopped broccoli, both cheeses, Parmesan, mustard, and garlic until you've got a paste that clings to the spoon—taste here and tweak if you like things extra cheesy.
- Fill those pockets:
- Spoon the mixture into each chicken breast; if anything tries to escape, I stuff it right back in and close with toothpicks.
- Bake it up:
- Arrange the stuffed breasts on the tray, spacing them apart, and bake until golden and bubbling (internal temp should hit 165°F).
- Finish and rest:
- Let the chicken rest five minutes to lock in juices—don't forget to pull out those toothpicks before digging in.
 Pin It
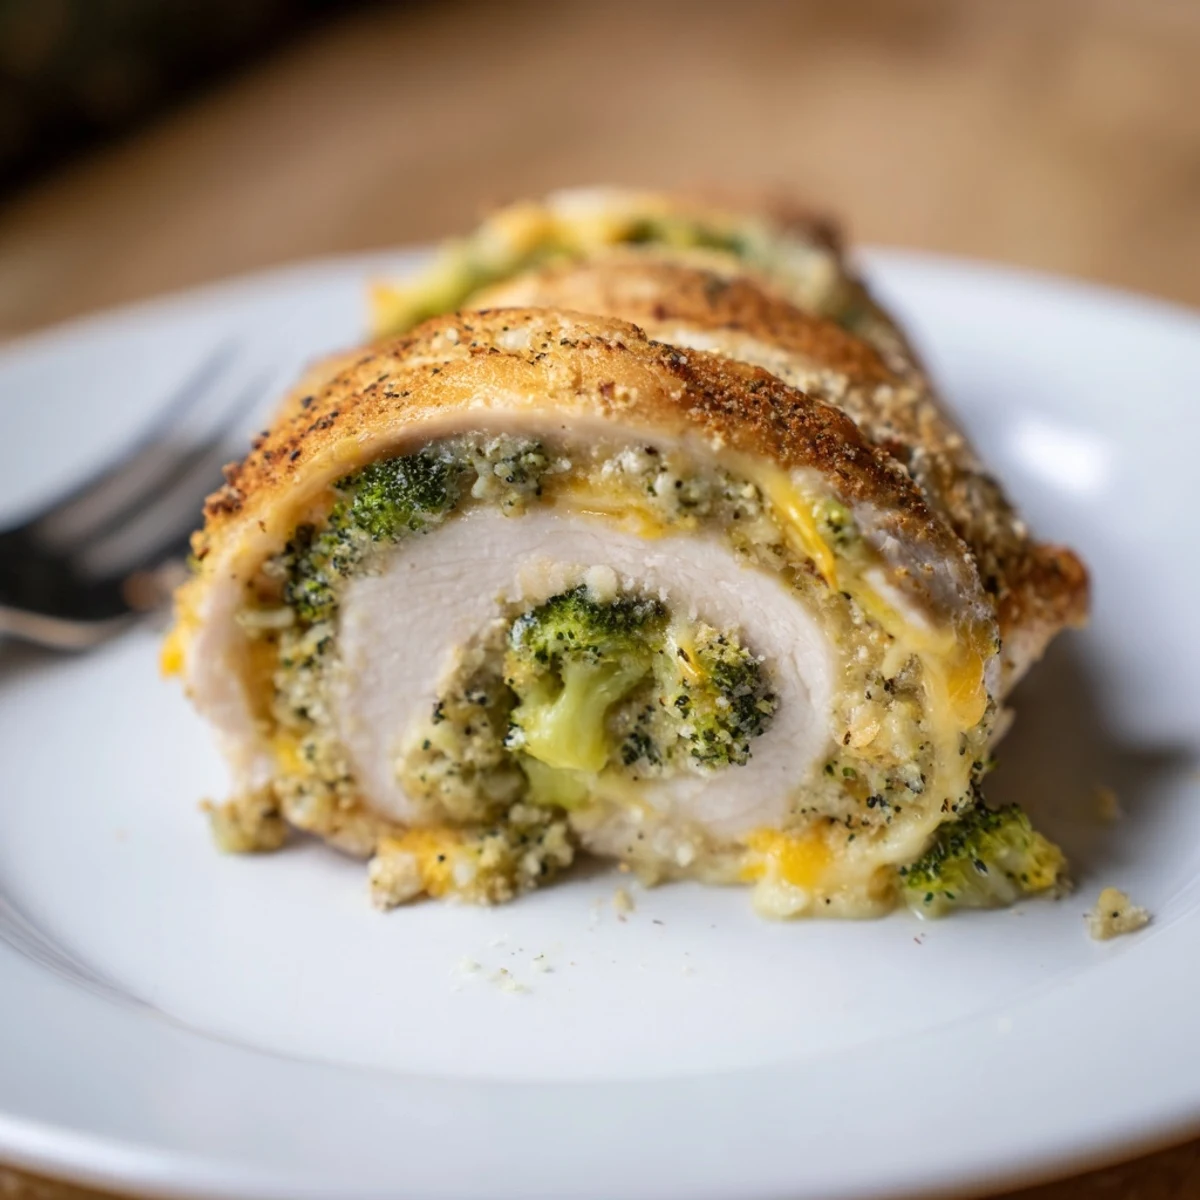
 The night my little cousin begged for seconds, interrupting her own giggles to ask for just one more bite, this recipe officially won its place on my favorite list.
Let’s Talk Stuffing Techniques
After a few attempts, I found that using the back of a teaspoon to push filling way into the corners keeps every bite exciting. Overstuffing tempts fate unless you’re a toothpick wizard, but gentle patience pays off with none of the goo escaping in the oven.
What Pairs Well with Broccoli Cheese Chicken
Crisp salads with zippy vinaigrettes or a heap of roasted vegetables balance the richness perfectly. If you want to lean in, a buttery white wine is practically made for sopping up those cheesy bits.
Troubleshooting and Serving Shortcuts
I learned not to panic at the first sign of cheese leaking—a little mess doesn’t ruin a thing. Leftovers (when there are any) reheat surprisingly well, wrapped in foil and baked low so the chicken stays moist.
- Don’t skip the resting time—it truly locks in juiciness.
- If the filling’s running wild, secure sides with two toothpicks criss-crossed for sturdier hold.
- For a golden top, broil for a minute at the end (but keep watch—cheese browns fast).
 Pin It
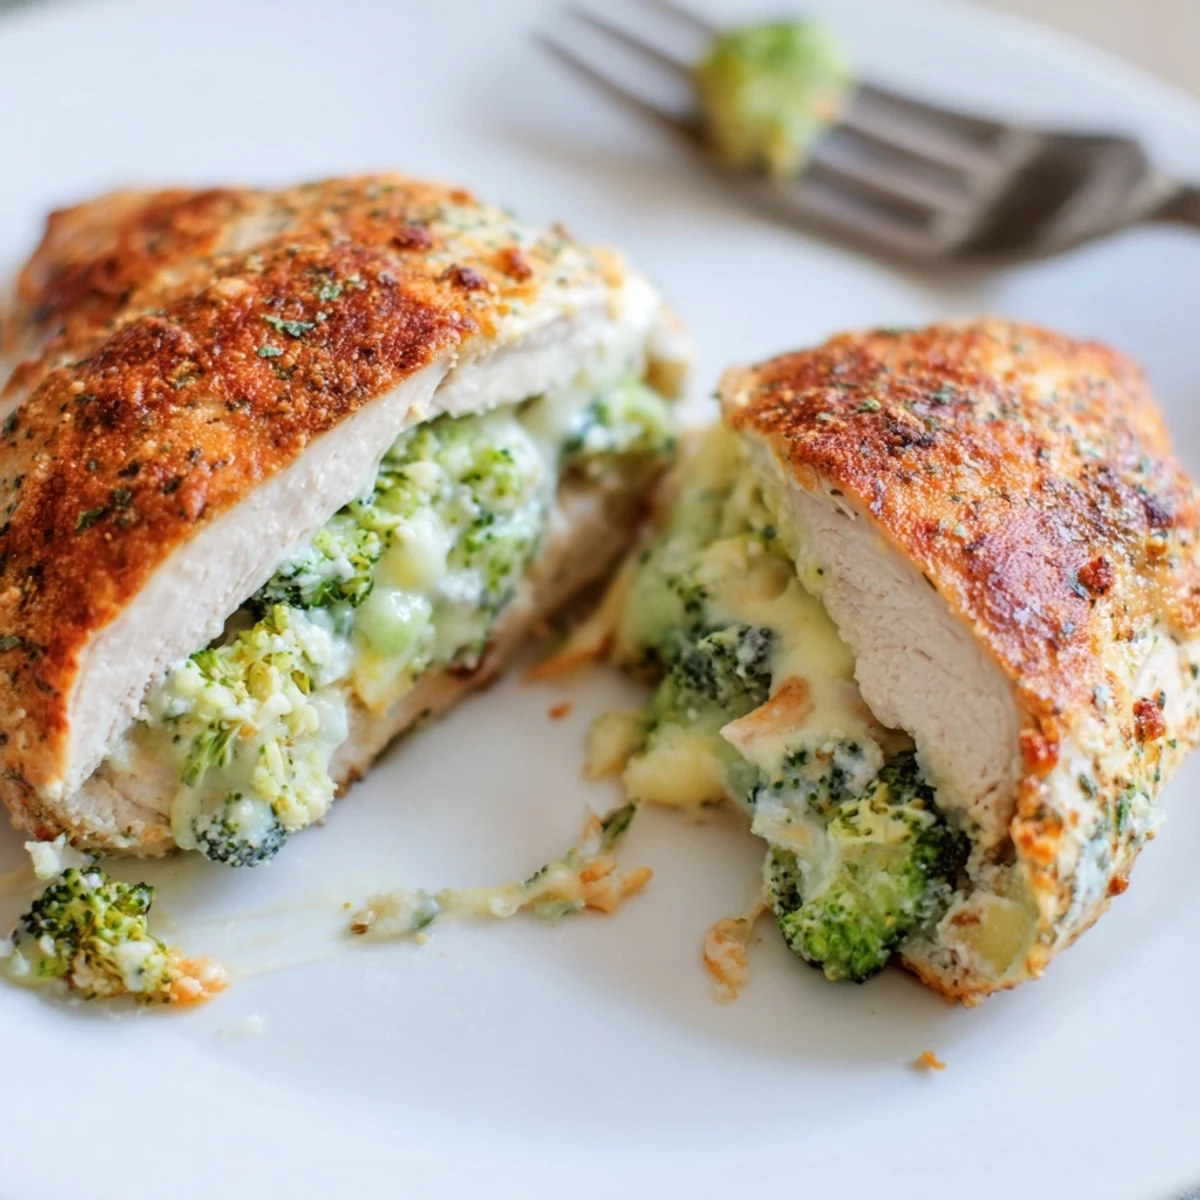
 If cheesy, veggie-packed chicken can turn a hectic weeknight into a celebration, I hope it does the same for you. Don’t be surprised when everyone asks for seconds!
Recipe FAQs
- → Should I blanch the broccoli first?
-
Finely chopping raw broccoli works, but briefly blanching (30–60 seconds) softens it and reduces moisture. Pat it dry before mixing with cheeses to avoid a soggy filling.
- → How do I keep the chicken moist?
-
Pat breasts dry, season inside the pocket, and avoid overstuffing. A light brush of olive oil and resting the cooked breasts 5 minutes helps retain juices and improves browning.
- → Can I swap the cheeses?
-
Yes—mozzarella or Swiss melt nicely for a milder profile. Keep a firmer cheese like Parmesan in the mix for savory depth and better texture.
- → How can I add extra flavor?
-
Fold in cooked bacon bits, chopped sun-dried tomatoes, or fresh herbs like thyme or chives to the filling. A small amount of Dijon boosts tang without overpowering the cheeses.
- → What internal temperature indicates doneness?
-
Use an instant-read thermometer; the thickest part should reach 165°F (74°C). If the filling is hot and cheese is bubbling, the breasts are ready. Let them rest briefly before slicing.
- → Can I prepare these ahead or freeze them?
-
Assemble and refrigerate up to 24 hours before baking. For freezing, seal individually on a tray, then transfer to a freezer bag; bake from frozen, adding extra time and checking internal temperature carefully.